The Back Story:
I am completely and utterly in love with the season of fall. I was born in the spring but should always have been a fall baby. I got married in the fall, had my son in the fall, and even my husband’s birthday is in the fall. I pretty much narrowed fall down to my favorite season pretty quickly in life.
Spring: Yes its my birthday season but I’m ghastly allergic to just about anything that grows and gives off pollen. So from March-May I’m usually sneezing my head off. That was an easy X.
Winter: I LOVE being outside and seeing things green or colorful. Winter is always depressing when literally your whole environment is dead. I’m okay with winter until about the first big snow storm and after New Years, but after that its -gag-. Another season crossed off.
Summer: I am absolutely in LOVE with the beach. I love the smell, I love the sounds, I love the looks, but I loathe the heat. If I could live in the endless summer of 80 degree weather in Hawaii, I would in a heartbeat. Plus I spent a summer of college years working at a local amusement park which pretty much sealed the deal for me hating the heat. 2nd place.
So by process of elimination, fall is my favorite. And well…I love fall decor!
The Inspiration:
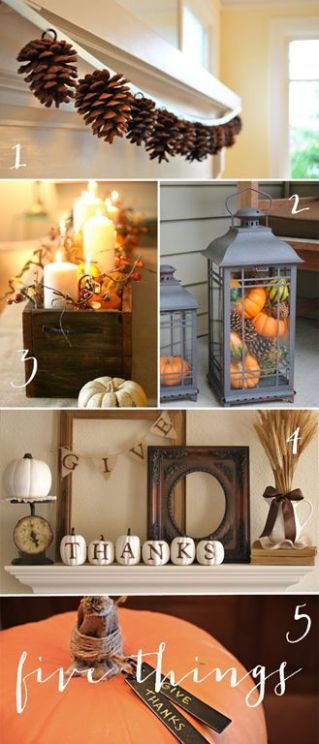
So this pin on Pinterest (Follow me: http://www.pinterest.com/iwanciodesign) actually inspired at least 2 blog posts so far. And I was actually inspired to combine two of the photos in the collage below for this project. I’ll be using this one in another post in the near future. Who knows, it might be the post right after this one. I’ll leave you in suspense.
Pin: http://www.pinterest.com/pin/204069426838565464/ (Thanks Inshoper) So anyway, I bet your’re just dying to know what crazy thing I figured out this time.
The Project:
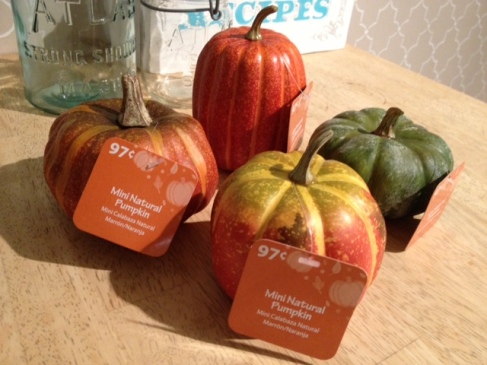
So I found this pin and just absolutely fell in love with the idea of picture #4. The pumpkins with the word “Thanks” with each letter on a separate pumpkin just be-stilled my heart. So I did some “soul searching” and found these cutie but oh-so-fake looking pumpkins for $.97. I got 4 to spell out “Fall” since well…you know…I’m frugal and all and didn’t want to shell out $2 more if I didn’t have to.
In line with my last posting about my glue stash (https://wifeofwhimsy.wordpress.com/2013/09/15/first-project-the-faux-apothecary-jar/) I also have an obscene amount of acrylic paint in my house. I always forget what colors I have since they’re spread out in 3 places in my home. So by now I probably have enough to paint my kid’s room in a vomit of acrylic color (Thankfully they’re only $.50-$1 a bottle). Anyway, I raided my stash and found 2-3 shades of cream paint to transform these foam pumpkins.
TROUBLESHOOTING TIP: Please please please…for the love of God DO NOT spray paint foam pumpkins. Most of the time spray paint will eat away at the surface and you’ll have a pumpkin that looks like it was devoured by termites.
I find painting to be very relaxing (Not painting whole rooms mind you… Whoever finds that relaxing has never felt pain in their life) so I spent about an hour adding 3-4 coats of my lighter cream base coat to cover the orange and green.
Now for those of you that are feeling “artistic” you can brush on a cream or tan color about 2 shades lighter than your base color to give your pumpkin a more realistic look.
INSIDER TIP: Lightly fill your brush with paint and brush on about 2-3 long strokes. Take a dry paper towel and lightly wipe off some of the excess paint. It doesn’t matter if it looks streaky, just as long as it looks a little more natural than a painted foam pumpkin.
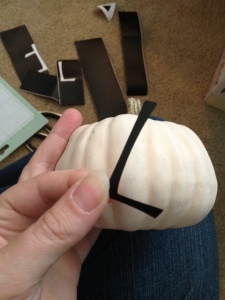
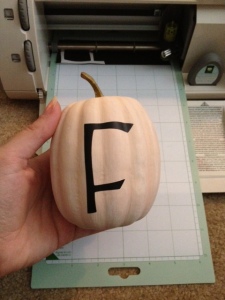
Now like most of you I went through a stage of “How-the-heck-do-they-make-those-letters-so-nice?” contemplation until I broke down and invested in a Cricut during a Black Friday special. These vinyl-and-other-things cutting machine is amazing for the mid-to-heavy-duty crafters. I used to use mine for scrapbooking but since a tiny human has now encompassed all my crafting time I mostly use it to cut out letters in fun fonts. I just cut a scrap piece of black vinyl (Its actually chalkboard vinyl from Michaels, its cheaper than buying online), set it on the sticky board, set the machine, and let her cut.
INSIDER TIP: If making the investment in a vinyl cutting machine, please spend a little more and invest in a Silhouette. You can do SO MUCH MORE with it and don’t have to buy those annoying cartridges. But for those of you that aren’t computer-literate I would go with the Cricut since everything you need to do is based through the machine.
Now I know some of you probably don’t have a cutting machine of any sort. So your options are one of two things: 1. Paint the letters on Or 2. Use stickers. Obviously the latter is MUCH easier and less of an eye-gouging experience. You can pick up some of the larger alphabet stickers either in the kids craft section (with the posterboards and school project supplies) or in the scrapbooking department. You can choose stickers or rub-ons but stickers are a lot less of a headache. So now that you have your vinyl/sticker/whatever ready line it up gingerly on the pumpkin and press down. Just lightly press down on the sticker until you have the placement you want. Then you can smooth it down firmly with your finger.
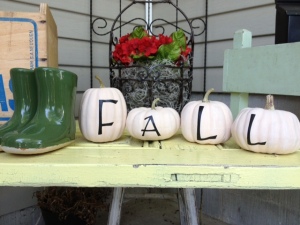
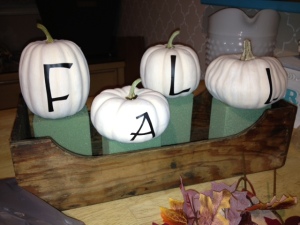
Ta-da! Looks purdy doesn’t it? And from far away it looks hand-painted! Your friends will be jealous.
So now that all the pumpkins have letters on them its time for a photo shoot! Good thing pumpkins are such good models.
Now originally I was going to put these on varying height candle sticks buuuuuuuuuuuuuuutttt of course I don’t have any that would look fitting enough for this display. AND (the BIG and) my beautiful, oh-so-beautiful fireplace mantle is currently being over run by my husband’s insane collection of electronic items. Apparently they’re decorative accessories to him and deserve to be placed on my mantle. Yeah. Right.
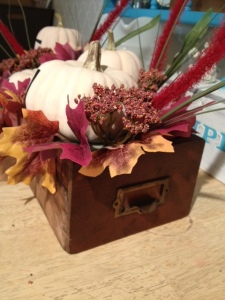
Anyhoo…so I tried to brainstorm a little on Pinterest and low and behold the same pin inspired an idea on how to display my pumpkins. I had found a beautiful old library card catalog drawer that was stashed in my grandparent’s basement. It was leftover from a work bench project my Gramps had created YEARS ago (made a work table out of scrap wood and made a little shelf and used these drawers as well, drawers for his small mechanical parts. Can you tell where I got my craftiness from?). I took one home with me and stashed it away for a future project. But in my musings about how to display these pumpkins, the proverbial light bulb blinked on above my head. So yes I headed back to my favorite place: Dollar Tree, and picked up some green craft foam and about 5 fall floral bushes. $6 to turn this into something amazing.
Dollar Tree thankfully randomly has a block of green floral foam (INSIDER TIP: Always always ALWAYS choose the GREEN floral foam – not the wet floral green foam. Its the BEST for floral design but its very messy to cut) that’s already cut up into 4 squares. Perfect. Less work for me. I cut the foam down just a tad to give the pumpkins varying heights. (INSIDER TIP: Cut foam outside or over the trash with a smooth edge knife or metal putty knife or icing spatula) I used wire cutters to cut down the floral bushes to about 3-4″ picks and stuck them in the foam. I highly recommend hot gluing everything if you would like it to last. I didn’t want to mess up the pumpkins or the drawer, just in case I wanted to use it on a future project.
Sure turned out purdy, didn’t it? Only cost me about $10 to make! Sadly I had to find a place of less prominence for her in my entry hallway instead of being able to bask in all its crafty glory on my mantle.
